PART 4
This is the fourth blog post about my CNC Sign Projects. I will show how I used Vectric PhotoVCarve to create a CNC toolpath from the Photograph we edited in Adobe Photoshop. Vectric PhotoVCarve allows you to take a Photograph and create a photo-realistic engraving. I have owned PhotoVCarve (PVC) for a while but I haven’t used it much because it takes some experimentation with settings before you get consistent results in all type of wood. Each wood has a unique grain and figure. Sometimes a strong wood grain like Oak can overpower a design so I wanted to make sure I had good settings because Oak was the wood the customer supplied.

HOW DOES VECTRIC PHOTOVCARVE WORK?
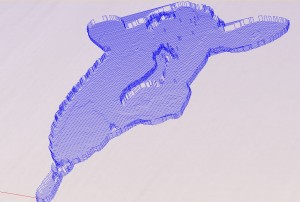
Vectric PhotoVCarve will create a toolpath from a photo. PhotoVCarve creates a series of lines or grooves that vary in width and depth to represent the detail in a photograph or image. Dark areas in the photo are machined with wide groove and the lighter areas are machined with narrower grooves. The software automatically calculates the toolpaths based on the cutter selected and maximum depth of groove required.
GETTING STARTED WITH PHOTOVCARVE
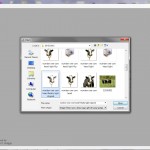
To begin creating a toolpath with PhotoVCarve you first load in the JPEG image we created last time. Click the “Load Image” button and then select the file from the window. PhotoVCarve will accept images in the following formats: JPEG, BMP, PVC, GIF,TIFF , PNG,and JPG.
BEING TRANSPARENT
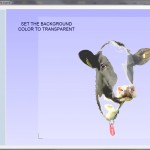
When you bring in the picture you will probably notice it also brought in a white box to represent the Background color. In most case you will not want the background to show so we need to get rid of it. Luckily, PhotoVCarve can easily do this for you. Simply Check the box that say “Make Color Transparent and click on the background color. When you do click on the background it will turn blue along with any other pixel of that shade in the photo. This step can greatly reduce the machine time.
You may notice a small problem though. There appears to be a white Halo around the image . This Halo is made up of pixels that were close to the background color but not exact matches. To get rid of these pixel manually takes a lot of time and patience. However, if you hold down the CTRL key when you select the background color, PhotoVCarve will remove the pixels for you. I was pulling my hair out till I found this tip.
SETTING MATERIAL
Next We set the material size. This is the actual measurements of the raw material you plan to use. If you expect to get accurate results you will use the actual values you measure instead of just guessing. You final design needs to fit on your raw material so measure length, width and thickness of the stock. Also select the lower left corner of the material for the origin point (starting point). Lastly select if you will be using Inches or Millimeters.
SETTING CUTTING PARAMETERS
The next step is setting up the cutting parameters of the V – Carving. This step involved the most tweaking. First you need to select the cutter from the tool database. I selected a 1/2″ diameter 60 Degree V-Groove bit, the Laser Point From CMT. This is the best bit I have found so far for this kind of work.
You must also set the cutting depth for the carving. I experimented and came up with a cutting depth of .0305″ for this project. Setting a deeper cut would make the project standout more but at a lower resolution. I also set the Line spacing at 125%. The lower the percentage the more lines there are and the closer together they are.
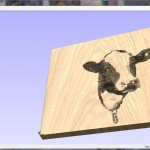
The angle of the lines can have a great effect on the final project. For a strong grain wood like Oak I wouldn’t recommend a shallow angle. 30 degrees worked well for my project. Bottom line is if the preview image looks bad, so will your final project. If the image looks good then it will look good as a final project.
PREVIEW AND SAVE TOOLPATH
Once you are satisfied with the preview image you can save the toolpath file. Vectric PhotoVCarve will not command your CNC Router table to move but it will generate a file which can be used by another program to cut the file. You tell PhotoVCarve how fast you want the cutter to move and which Driver (post processor) software you are using. In my project I used a program Called Mach3. Mach3 commands the motors to move to just the right spot for the cutting to take place. PhotoVCarve saves the cut file as a text document, Mach3 can read the file.
WHATS NEXT?
Next time We will take the toolpath we just created and import it into VCarve Pro so that we can prepare the sign layout. Things should pick up from here because we have some video of the processes involved. If you found this post helpful why not leave a comment below or join our free newsletter where you can hear about this and many other maker movement projects.
CNC SIGN PROJECTS:
PART TEN



How long does it take for the CNC router to create the image from Vcarve?
That depends on how complex the image is Andy. Simple pictures can be made in about 15 minutes. Complex images can take hours.
Bill
[…] This Post! I made a few more posts in the CNC Sign Projects series. In the first post I talked about the what stains and router bits were needed to make the […]
[…] that the workpiece is defined we can uset the PhotoVCarve toolpath we created in PhotoVCarve last time and import it into Vectric Aspire. Click on FILE, Import, […]
This step by step is very helpful. I have just started with PVC and I import it into Aspire. I’m not satisfied with my results yet, so much tweeking. You’re right about no one ever showing the complete process. I was disappointed with the “tutorial” for PVC. Not as informative as their usual ones. I’ve gotten better information from the forum. Thanks a big bunch!
Diane in Alabama (Redneck Riviera)
Diane,
I’m glad you found the tutorials helpful. PhotoVCarve does take some tweeking to get great results but it is possible. Thanks for sharing your thoughts. Please let me know if you have any questions or any topics you would like to see covered.
Bill
[…] (usually peanuts). I recently wrote about this in my blog. Here is a link to one of the articles. CNC SIGN PROJECTS – VECTRIC PHOTOVCARVE Bill __________________ Making the world a better place, one project at a time. CNC Router, […]