CNC SIGN PROJECTS SAMPLES AND SETUP
ONE MORE TEST PIECE
Part 9
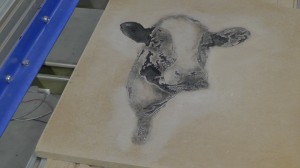
After spending quite a bit of time making sample test pieces I decided that the entire process took too long to setup so I decided to try one more technique to help speed things along. I decided that I would eliminate the stain process completely from the PhotoVCarve and use only stencil ink. My idea was to do the PhotoVCarve tool path first. then create a paint mask cut to rough shape around the V-Carving.
Next I sprayed
Stencil ink on the areas of the carving that were dark. I didn’t have to worry about over spray because I planned to remove it with a sander. The trick would be to artistically sand only the areas where I wanted to remove the stencil ink. Most of the ink would stay in the depths of the carving but I wold be sanding to create highlights. The sample results from this test were promising but the image wasn’t as crisp as the previous tests. I think a nice alternative would be to spray and then use a thickness planer to the cutout depth. I may do some experimenting in the future with that technique.
SETUP FOR THE FINAL SIGN
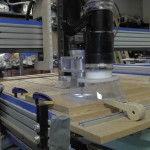
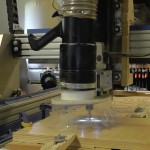
I was satisfied that the sign would look good using the techniques I had tried so far. So the only thing to do was get the Oak setup for cutting. I decided that I would cut the PhotoVCarve into the surface of the oak and then apply the paint mask after I stained the wood. I mounted the wood on the table and clamped it in place. I intended not to move the wood after it was clamped down so that the paint and carvings would stay in alignment. I loaded the G-Code into Mach3 and ran the PhotoVCarve toolpath.
- Oak board clamped in place.
- PhotoVCarving the background
- Satin serves as shadows.
- Stain added.
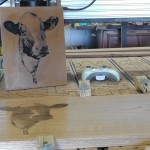
- First test piece compared to oak.
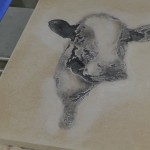
- Stencil Ink and sander gave fast but inaccurate results.
When The PhotoVCarve was completed I buffed it lightly with a ScotchBrite pad and then stained it with MinWax Provincial stain. The stain would serve as the shadow areas in the final carving and so it was put on darker than normal. After I applied the stain to the cut area, I wiped the excess from the finished surface with a clean rag. I left the board clamped to the table overnight to dry.
The following morning I applied paint masking film to the oak board. To do this it was necessary to only remove one clamp at a time so the board wouldn’t move. I applied the film and burnished it down using a squeegee. I paid particular attention to the carved area to ensure the film stuck. After the film is smoothed down near the clamp s you place the clamp back on and move on to the next area until the film covers the entire board and all the clamps are back in place.
MEASURE UP
One lesson that I learned while doing this project is that size matters. Not in the conventional way but as far a Z depth is concerned. VCarvings need very precise depth movements to project the desired image. The software uses the geometry of the router bit to determine how deep it has to go to achieve a specific width. If any part of the equation is off so will the finished piece be off. In my case I had to account for the thickness of the paint mask when generating a tool path. The film was .003″ thick so I had to add -.003″ to the depth. You can either do this manually in Mach3 or during the initial tool path setup.
NEXT TIME
Next we will wrap things up and cut the sign. I hope you have found this tutorial series useful. Please let me know what I missed. I plan to provide a PDF version of the entire series. If you would like to receive a free copy of the PDF sign up for our free CNC INFO newsletter or follow me on Twitter @BillGriggs.
CNC SIGN PROJECTS:

[…] PART T NINE […]
[…] PART NINE […]
[…] PART NINE – COMING SOON […]
[…] PART NINE – […]
[…] PART NINE – […]
[…] PART NINE […]
[…] PART NINE […]
[…] PART NINE […]
[…] PART NINE […]